Configuring GPM.NET to run as a service
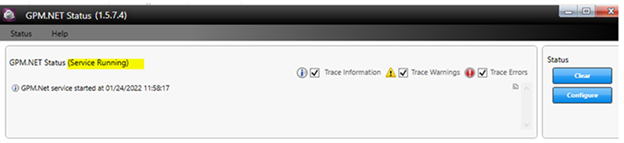
Note: GPM.NET installs as a windows service by default. Before making the following change, please check if GPM.NET is running as an application. If GPM.NET is running as a service, no further steps needs to be taken.
-
Stop Galileo Print Manager.net on the agent's computer.
-
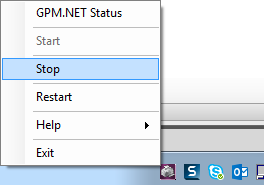
Right-click the GPM.NET Service Monitor icon (
 ) in the Windows notification area (located on the right side of the Windows taskbar).
The following menu appears:
-
Click Stop.
-
Right-click the GPM.NET Service Monitor icon (
) in the Windows notification area (located on the right side of the Windows taskbar). -
Click Exit.
-
-
Using Windows Explorer, open the Galileo Print Manager.net application folder (typically, C:\Program Files (x86)\Galileo Print Manager.NET).
-
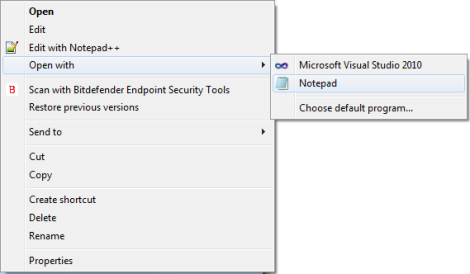
Right-click the Travelport.PrintManager.TPMServiceMonitor.exe.Config file, and then select to open with Windows Notepad (or similar text-editing software).
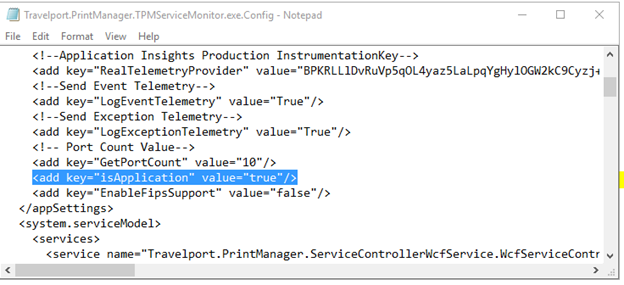
Travelport.PrintManager.TPMServiceMonitor.exe.Config
The highlighted line shows the parameter for this feature.
-
Notice that the isApplication parameter value is set to true. To run GPM.NET as a service, change the value to: false
-
On the File menu, click Save.
Note: If you are unable to save the Travelport.PrintManager.TPMServiceMonitor.exe.Config file, see Unable to Save Manually Edited Configuration Files in the Galileo Print Manager.net Application Folder.
-
Start the Galileo Print Manager.net.
The GPM.Net will now run as a service.